How to Retouch Skin in Premiere Pro: The Built-in Lumetri Method and a Plugin
This article covers two ways to make a person's skin look better in Premiere Pro: using only the built-in tools, and using a plugin.
I am a video editor in Japan (music videos, interviews and commercials), and I retouch skin as a regular part of that work. I also develop Totonoe Skin Retouch, the plugin described in method 2.
Short answer
- If you do not want to spend anything, use HSL Secondary in Lumetri Color to select only the skin color, then set Sharpen to a negative value.
- If you have many cuts, or you care a lot about the finish, use a skin retouch plugin.
The tips for a natural look apply to both methods. They are in the second half of this article.
Method 1: Smooth skin with Lumetri Color (HSL Secondary)
This method uses only the tools that come with Premiere Pro.
- Select the clip you want to retouch and open the Lumetri Color panel (Window > Lumetri Color). Click HSL Secondary to open it.
- In Key, use the Set color eyedropper and click a mid-tone area of the cheek.
- Check the Color/Gray box to see what is selected. Areas shown in gray are not selected. The first click often selects only the darker parts of the skin, so use the + eyedropper to add brighter areas such as the forehead and the top of the cheek. If clothing or background is selected, use the − eyedropper to remove it. You can also adjust the H, S and L sliders. The goal is a selection where only the skin keeps its color.
- In Refine, raise Denoise and Blur a little to blend the edge of the selection. I used Denoise 10 and Blur 6 on my example footage.
- Uncheck Color/Gray, then set Sharpen under Correction to a negative value. Start around -30 to -50.
- Compare with the footage before correction and check the result. At -100, fine wrinkles are reduced further, but the outlines of the eyes and eyebrows also become soft.
To apply the same look to many clips at once, put Lumetri Color on an adjustment layer.
Weak points of method 1
This method is quick, but it has these weak points:
- Backgrounds, clothing and hair with a color close to skin are selected too, and they are blurred as well.
- A negative Sharpen blurs the whole selection evenly. At a strong setting, the outlines of the eyes and lips also become soft, and the skin can look flat and painted.
- On shots where the lighting changes or the subject moves, the selection can fluctuate and the correction can flicker.
- You have to pick the color again with the eyedropper whenever the shot or lighting changes.
For one short interview this is enough. On a project with many cuts, or with a person who stays in a close-up for a long time, these points become a burden.
Tips for a natural look (both methods)
- For log footage, apply a color conversion first (for example a Rec.709 LUT), then retouch the skin. In log, skin color is not captured correctly, so the skin selection does not work well.
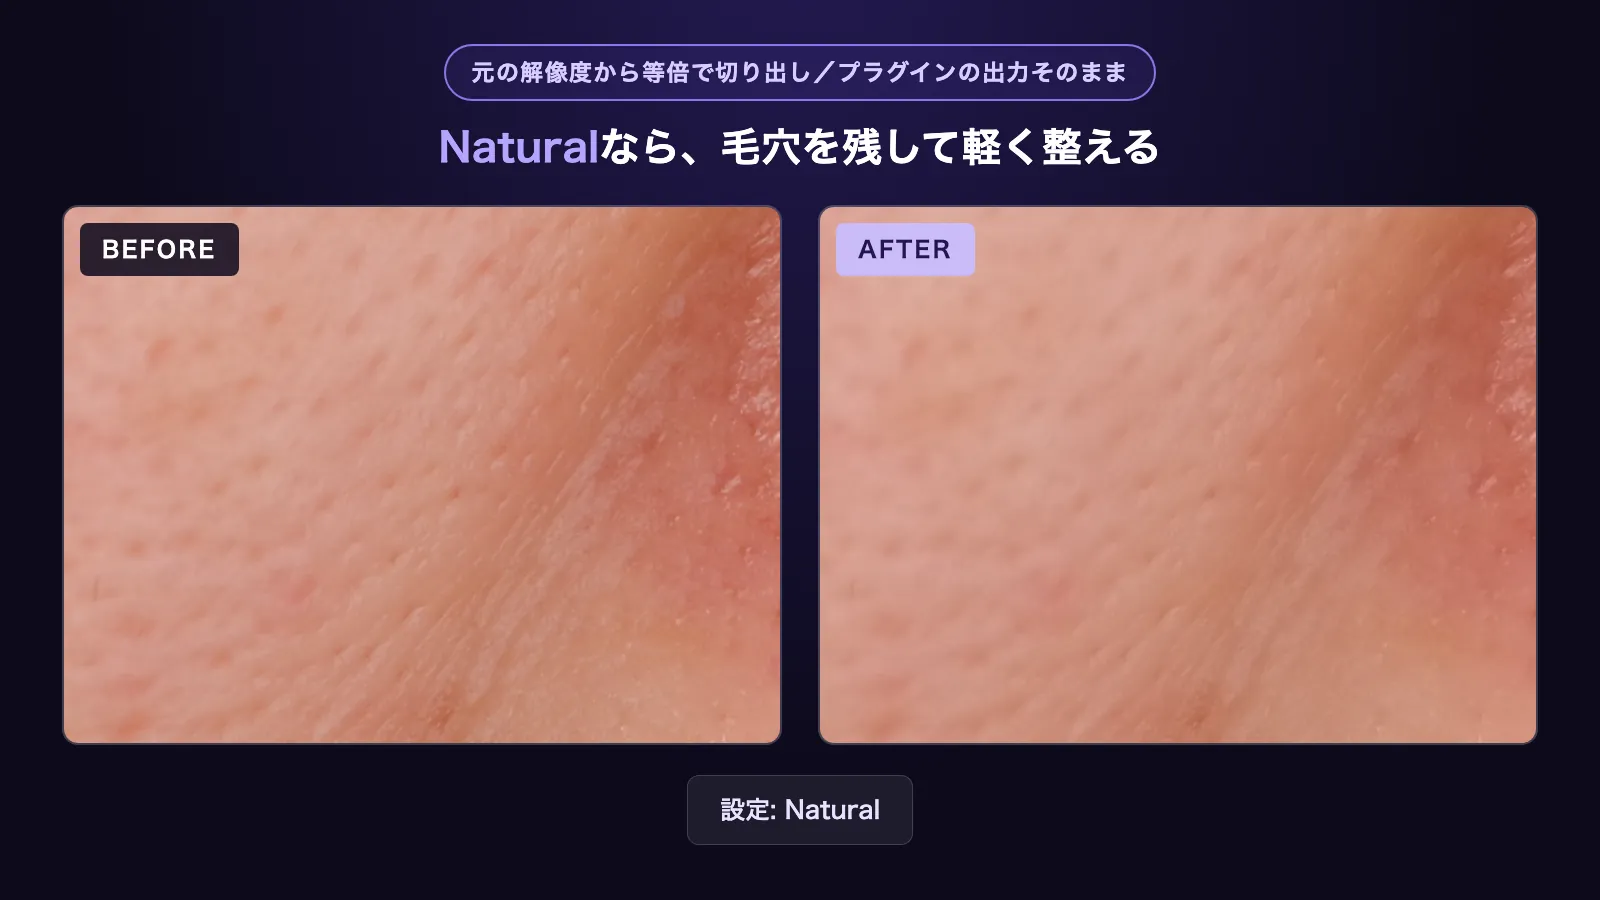
- Do not remove all of the pores and skin texture. Skin looks more natural when some texture remains.
- Check at 100% zoom. At a reduced zoom it is hard to notice when you have gone too far.
- Compare with the footage before correction. As your eyes get used to the result, you tend to apply more and more.
- Do the final check on the exported video.
Can a LUT smooth skin?
No. A LUT (look-up table) changes color, not detail. Adobe describes LUTs in Premiere Pro as a way to manipulate saturation and contrast or to change the color of a clip (Adobe: Add Look-up Tables). A 3D LUT gives each pixel a new color looked up from that pixel's own RGB values (3D lookup table). Smoothing skin needs the values of neighboring pixels, as a blur does, so a LUT cannot soften pores or fine texture.
What a LUT can do for skin:
- Warm up or cool down the overall skin tone
- Reduce the saturation of reds
- Lower contrast or lift brightness, which can make texture a little less visible
A LUT changes every pixel that has the same color, so a background or clothing in skin-like colors changes too. To smooth the skin itself, use a blur-based method such as method 1 above (a negative Sharpen inside an HSL Secondary selection) or a skin retouch plugin. You can still use a LUT for the color grade before or after the skin retouch.
Method 2: Use a skin retouch plugin
There are established skin retouch plugins for Premiere Pro and After Effects from overseas developers, such as Cosmo II in Magic Bullet and Beauty Box from Digital Anarchy. They detect skin, smooth it while keeping edges, and restore texture automatically, which reduces the weak points of method 1 together. On the other hand, they are cost around US$200 or more, or are sold as subscriptions.
So I made Totonoe Skin Retouch for my own projects. It is sold on Gumroad as a one-time purchase of US$65, and there is a free trial with the same features as the full version.
Three steps
- Apply the effect Skin Retouch to a clip. Skin is detected automatically the moment you apply it.
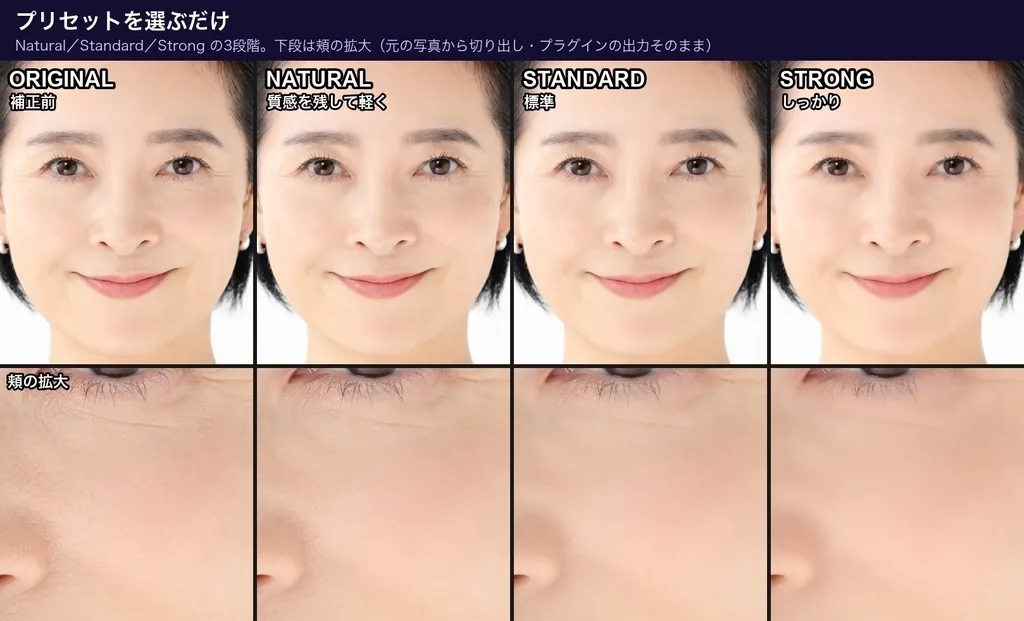
- Choose a Preset (Natural, Standard or Strong).
- Adjust the strength with Amount.
You can try this on your own footage with the free trial. It has every feature of the full version, and the only difference is a faint diagonal-stripe watermark on the video.
How it addresses the weak points of method 1
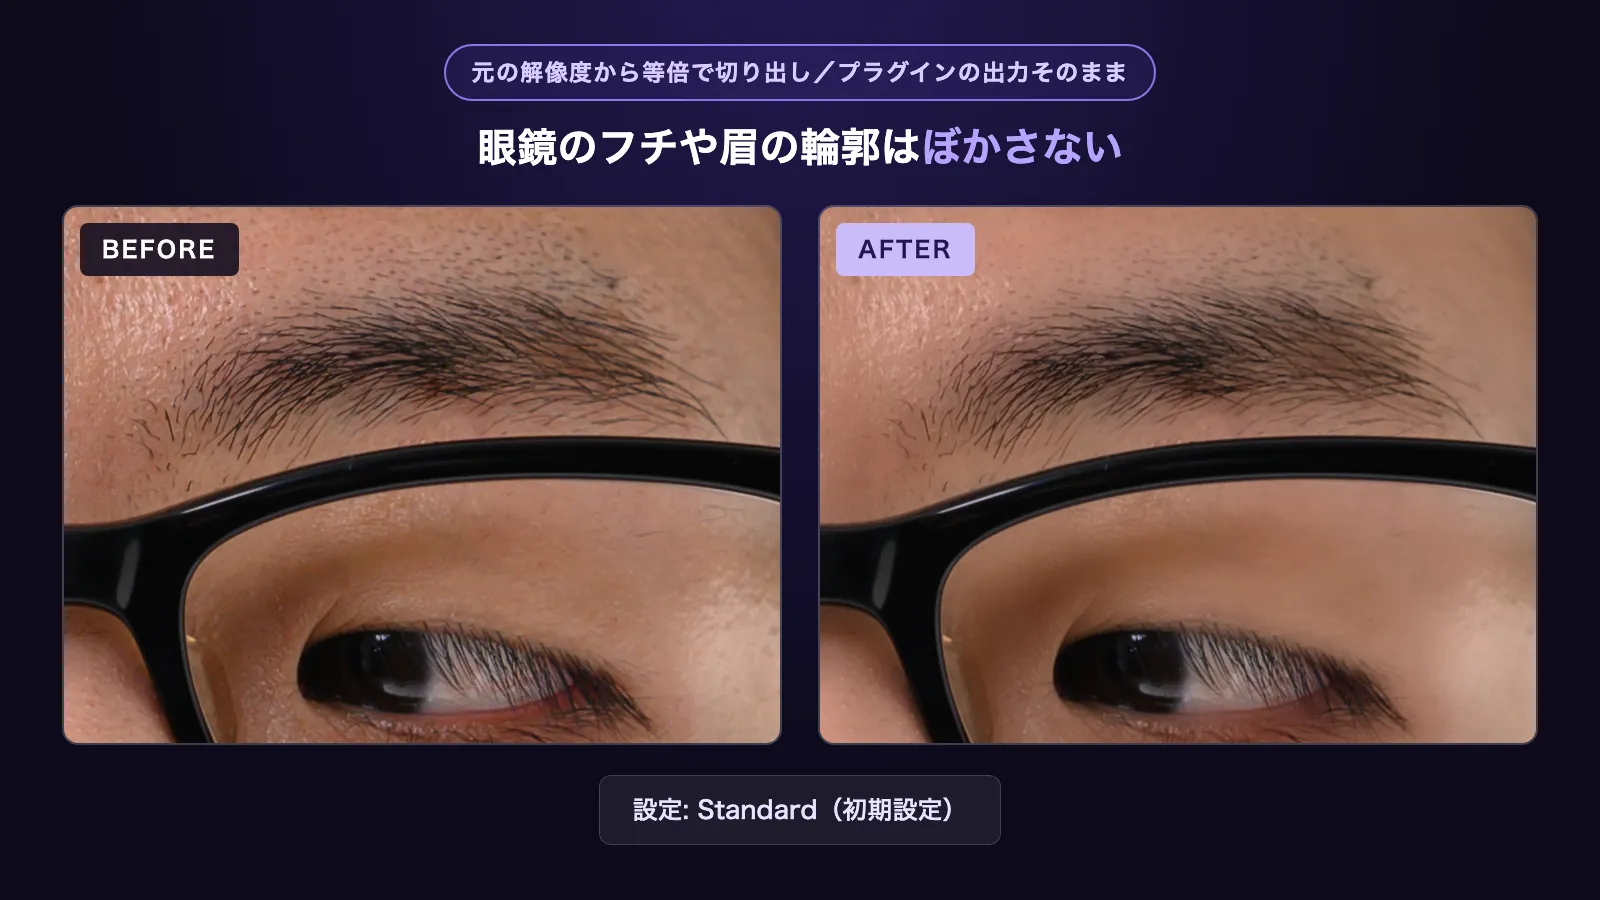
- The smoothing keeps edges, so outlines, hair, eyebrows and eyelashes are not blurred.
- It restores the fine texture that smoothing removes, so the skin is less likely to look painted.
- It estimates the skin color automatically on every frame, so you do not have to pick the color again for each cut.
- Temporal Stability refers to neighboring frames to steady the skin detection, which reduces flicker in moving footage.
- Shine, blemishes, redness and paleness can be adjusted with separate sliders when you need them.
Limits
The plugin finds skin by its color, so it can pick up a background whose color is close to skin. When that happens, turn on Show Mask to display the detected area in white, then narrow Hue Range. If several people are in the shot and you want to retouch only one of them, combine the plugin with a mask in Premiere Pro.
For how skin retouching looks in moving footage, see the 44-second demo video. For every parameter and troubleshooting, see the user guide.
If the retouched skin looks flat, see Skin Retouch Texture in Premiere Pro: Fix the Plastic Look.
System requirements
- macOS 13 or later (Apple Silicon and Intel)
- Windows 10 / 11 (64-bit, CPU processing)
- Premiere Pro or After Effects 2025 or later (one plugin supports both)
A free Windows beta is available until November 15, 2026. Get it from the beta page on BOOTH. The official Windows version will be released on November 16, 2026.
The official Windows version is available. It is included in the full version product, so one purchase covers both Mac and Windows.
Where to get it
Free trial (every feature, with a faint diagonal-stripe watermark on the video)
Full version (one-time purchase, US$65)
The product page has the overview, comparison images and FAQ.
Summary
- To try first, select the skin with HSL Secondary in Lumetri Color and set Sharpen to a negative value.
- If the background gets blurred too, the outlines turn soft, the result flickers, or picking the color again for every cut is a chore, consider a plugin.
- With either method: convert log footage first, keep some texture, and check at 100% zoom and against the footage before correction.